Yin Bakes

I bake. I snap. I eat. I write.

Category: Cake

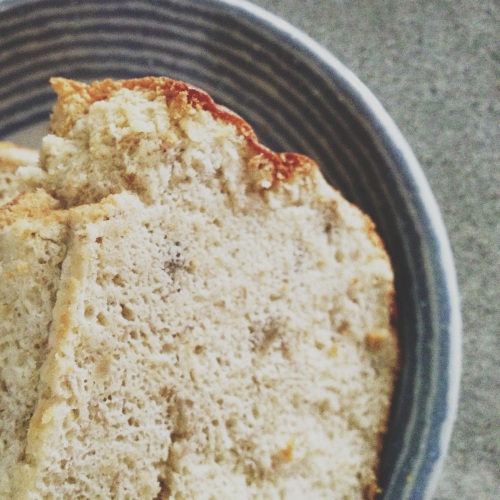
Banana Chiffon Cake

Chiffon cakes are foolproof cakes. At least they are for me. I can simply whip them up and they always turn out perfectly. You can make chiffon cakes work for you too, if you know how to beat your egg whites right. I used to have problems with beating egg whites till stiff peaks, that is I would over-beat them till they dry out, or that they don’t reach the stiff peak stage at all. That’s a bummer, but with a lot of practice (and many failed recipes and deflated cakes later), I have finally mastered how to whip my egg whites right.

I love bananas. So much that I had to have them everyday. You would probably have notice that by now, since my blog header is of a bunch of bananas (hah!). In my family, we rarely have any leftover bananas – they will be all gone within a day or two if we bought any from the fruit stall. What we would do is to buy extra bunches of ripe bananas just for baking and leave them to ripe further on the kitchen table. Bananas go well with anything, and they are especially tasty in cakes. No one in the right mind could resist a good banana cake. Oh, and the aroma of freshly baked banana cake wafting from the oven… YUM!

A chiffon cake made with overripe bananas is even better than your regular banana bread. Banana breads are dense, moist and a bit too heavy to digest. On the other hand, chiffon cakes are soft, airy, light and fluffy – just like cotton, you get the gist. You can have slice after slice of it and never feel too full. Perfect as a good, light snack. Or breakfast, since I prefer having a light meal to start my day off.

Banana Chiffon Cake (adapted from Christine)

Preparations:

  1. Prepare an 8 inch (20 cm) chiffon tube pan. DO NOT grease or oil the mould. You want the cake to stick to the mould so it will not fall out when you invert the mould to cool.
  2. Preheat your oven to 165°C.

Ingredients:

  • 80 grams cake flour
  • 3 egg yolks
  • 14 grams castor sugar
  • 35 grams vegetable oil
  • 45 grams milk
  • 1/8 teaspoon salt
  • 2 ripe bananas, about 240 grams
  • 4 egg whites
  • 40 grams castor sugar
  • 1/2 teaspoon cream of tartar

Method:

1. Use a blender or a food processor to process the bananas into a purée. Set the banana purée aside.

2. Mix the egg yolks with 14 grams of sugar until smooth. Add oil, milk and mashed bananas. Combine them very well. Sift in cake flour, incorporate all ingredients well until you get a smooth batter.

3. Use an electric mixer to beat egg whites first for a while until bubbles form. Add cream of tartar. Add one-third of the 40 grams of sugar at a time. Beat well between the adds, until stiff peaks form. You will know when your egg whites are well beaten if you can invert the bowl and the egg whites will not fall out. Also, the meringue should look glossy.

4. Fold in the egg whites gently into the batter. Add one-third of egg whites at a time in order to easily incorporate the egg whites.

5. Transfer the batter into the cake pan. Pop it into the preheated oven and bake for 55 to 60 minutes. Test it by an inserted skewer coming out clean.

6. Remove from oven and immediately invert the cake mould on a wire rack to cool and prevent it from sinking. Let it cool completely. Carefully remove from the cake mould. Enjoy!

Japanese Cotton Sponge Cake

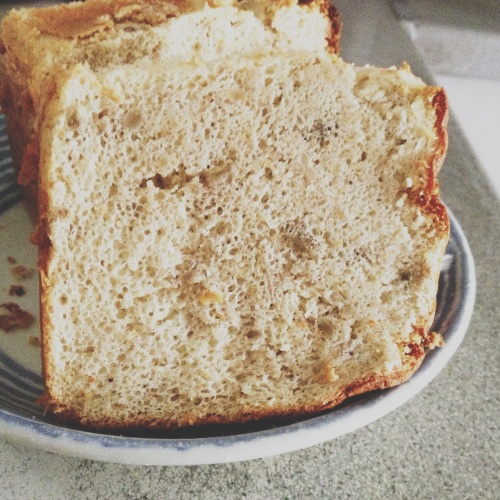
Nothing beats Japanese cakes, seriously. Their texture is to die for. They are light, moist, soft and velvety; everything a good cake should be, in my opinion. I’m really glad I’ve found this recipe because I really do not want to fork out a lot of money just to buy a slice of them at the bakeries. They don’t come cheap. And why buy if I can just whip it up in my kitchen in just a few minutes (and save a whole lot of money in return, because one slice just isn’t enough). To think that the key ingredient for achieving their soft, moist and light texture is meringues (whipped egg whites), the price that you have to pay for them is unjustifiable. These cakes are not even hard to bake, trust me.

This recipe is a plain cake, with a subtle hint of butter. Which is good because my family doesn’t like cakes which are too… buttery (is that even a word?). Or dense, like carrot cakes. I highly recommend that you try this recipe out because it is really very good, considering the fact that my family and I had a hard time resisting the temptation to reach out for another slice of it. Like I said, one slice just isn’t enough.

You could also slice the cake in half horizontally and slab on a thin layer of buttercream (for a layer cake), but it is so good on its own, I don’t really see the point of doing it.

Japanese Cotton Sponge Cake (adapted from My Sweet Hut)

Preparations:

  1. Prepare an 8″ square baking pan and line it with baking paper.
  2. Position a rack in the middle of your oven and preheat to 170°C.

Ingredients:

  • 60 grams melted butter
  • 80 ml fresh milk (at room temperature)
  • 80 grams cake flour (sifted)
  • 1 egg and 5 egg yolks (lighten beaten)
  • 1 teaspoon vanilla essence
  • 5 egg whites
  • 80 grams sugar
  • 1/4 teaspoon salt

Method:

1. In a bowl, mix the melted butter and milk together.  Add in the sifted flour and mix them till they are well combined.

2. Add in the beaten egg yolks and vanilla essence into the flour batter. Mix till they are well incorporated.

3. In a separate bowl, whisk the egg whites and cream of tartar till they are foamy.  Add in sugar and salt in batches and continue to whip till the egg whites are smooth and glossy (close to stiff peaks). When you lift the batter up, the tips should stand with little crooks at the end of the tips.

4. Fold 1/3 of the meringue into the egg yolk and flour batter until they are well combined.  Fold another 1/3 of the meringues and repeat the same step until all the meringues are used up.

5. Pour the batter into the prepared baking pan. Tap the pan to remove any air bubbles in your batter.

6. Bake at 170°C for 10 minutes. Then, reduce the heat to 155°C and continue to bake it for another 30-35 minutes.

7. When the cake is ready, remove the cake from the oven and invert the cake on a wire rack to cool for about 5 minutes (to prevent cake from sinking).

8. Remove the cake from the pan. Do not wait for too long, otherwise the heat will evaporate and condense into water, resulting in a wet cake bottom.

9. Let it continue to cool completely on a wire rack before cutting the cake with a serrated knife. Serve it as you wish.

This cake keeps really well too. Even after a couple of days without refrigeration, it is still light and moist. This one’s a keeper for sure. I can see myself baking more of this cake in the near future.